Joining your world · Java Edition
Join on Minecraft
Java Edition.
This guide is for a computer with Minecraft Launcher: Windows, Mac or Linux. There are two parts. The first, setting up the right version, you do once on each computer. The second, adding your world, you do once in the game. Every step has a picture, and the orange outline in it is what to click.
- Each player needs their own copy of Minecraft: Java Edition, signed in to Minecraft Launcher.
- The world owner must add each player’s Java profile name in the dashboard first. Where to find yours.
- You need the server address and the Minecraft version from the dashboard. These pictures use 1.21.4; use the number your world shows.
Part 1 · Once per computer
Set up the right Minecraft version
Minecraft Java only joins a server on the same version. Minecraft Launcher starts the newest version unless you tell it otherwise, and your world runs the version shown in your dashboard (1.21.4 for most worlds). You make an installation for that version once, and then choose it whenever you play.
-
Open Minecraft Launcher and choose Java Edition
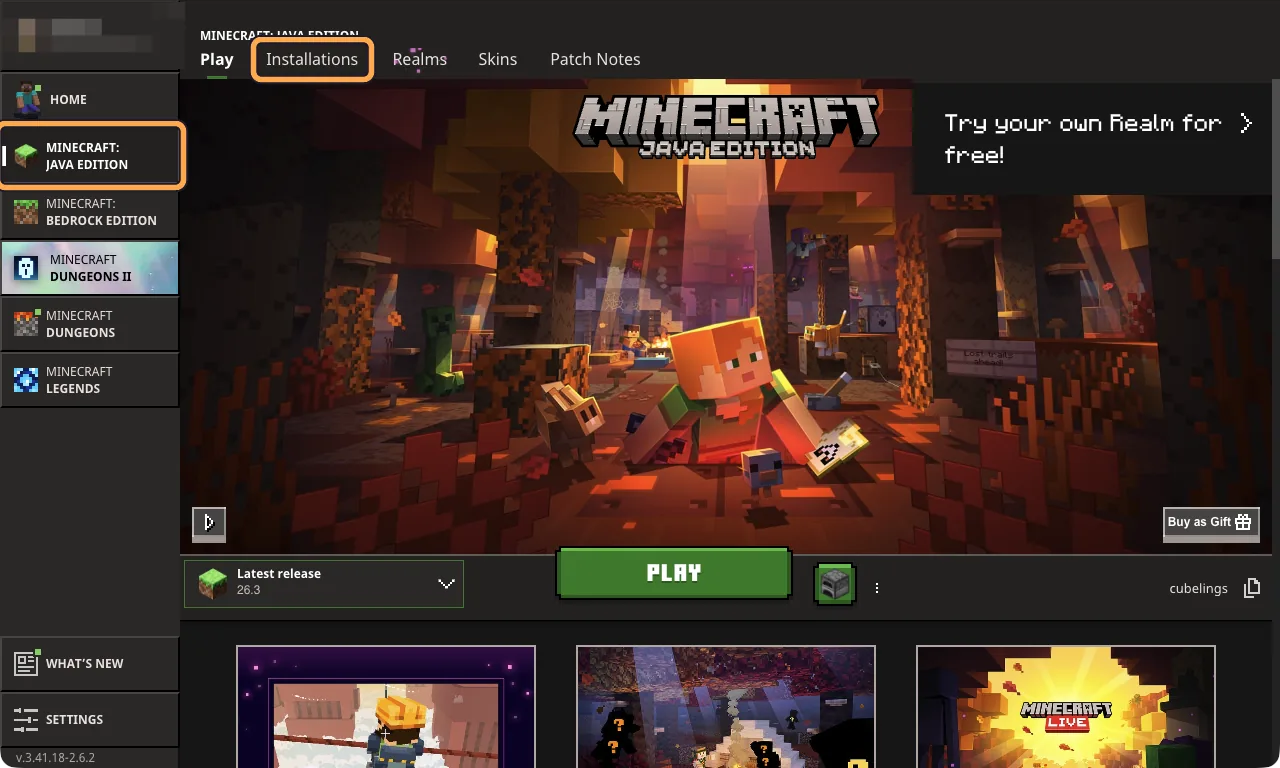
On the left, select Minecraft: Java Edition. Then select Installations along the top.
-
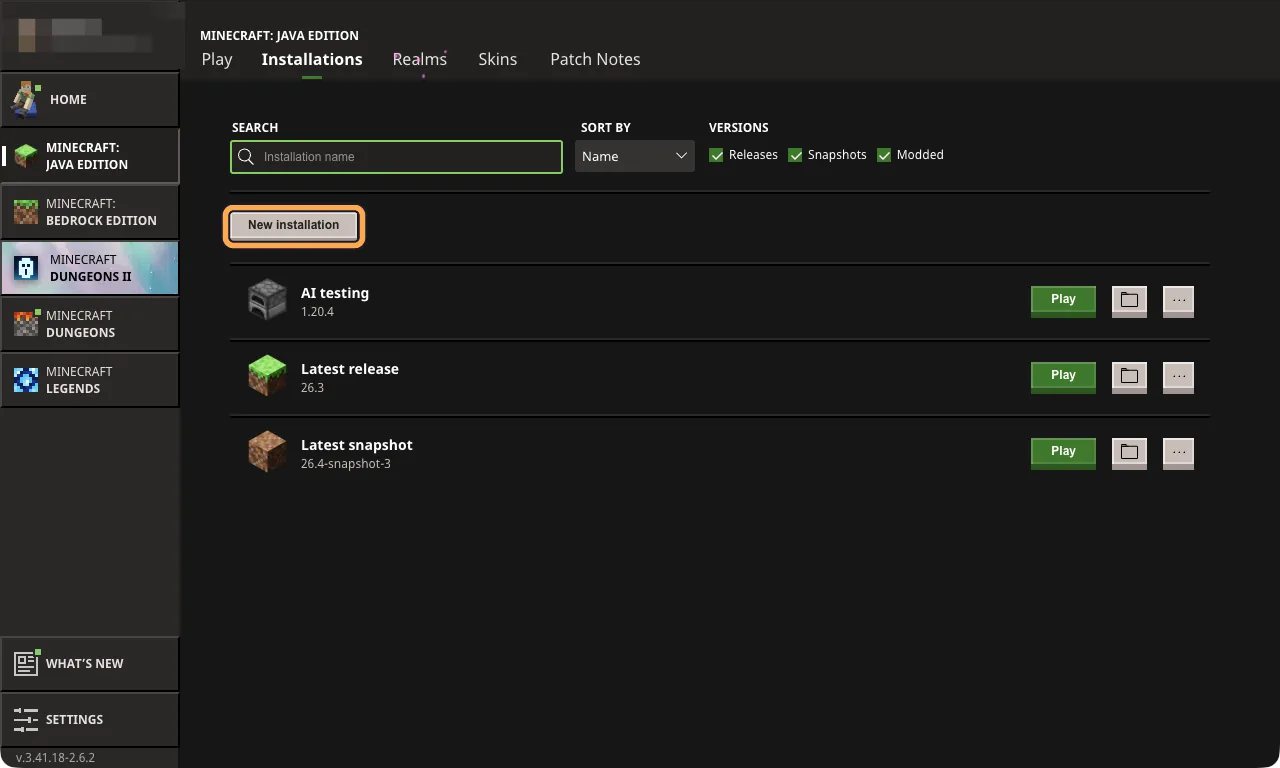
Select New installation
The list shows the installations you already have. Most people only have Latest release, which is the newest Minecraft and not the one your world uses.
-
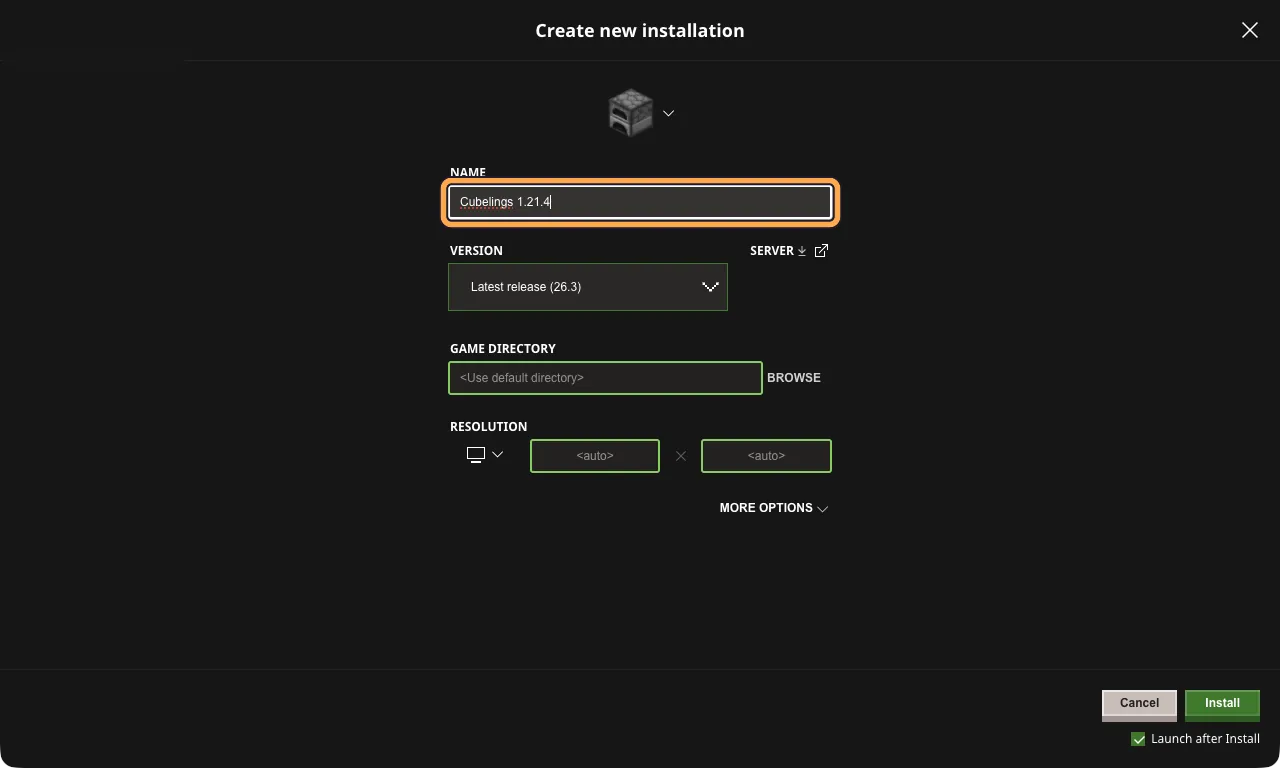
Give it a name
Type a name you will recognise later, such as Cubelings 1.21.4. The name is only for you.
-
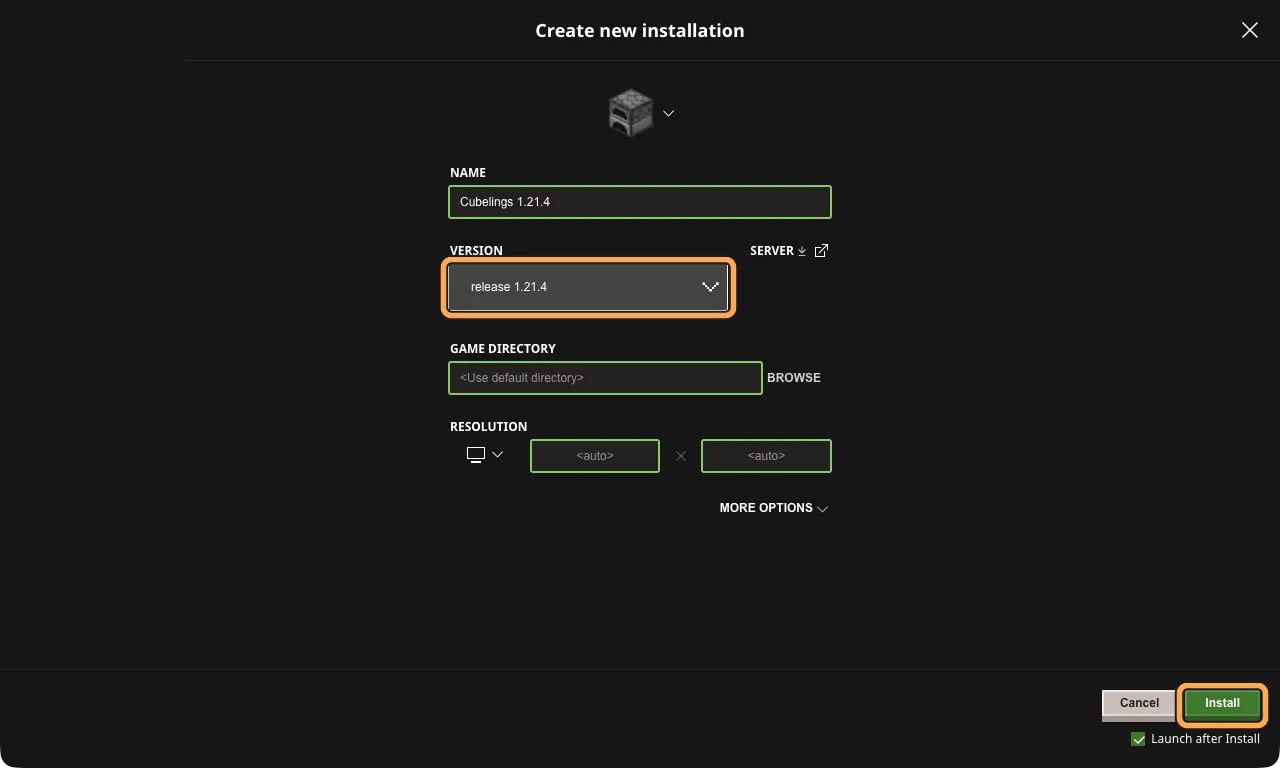
Choose the version
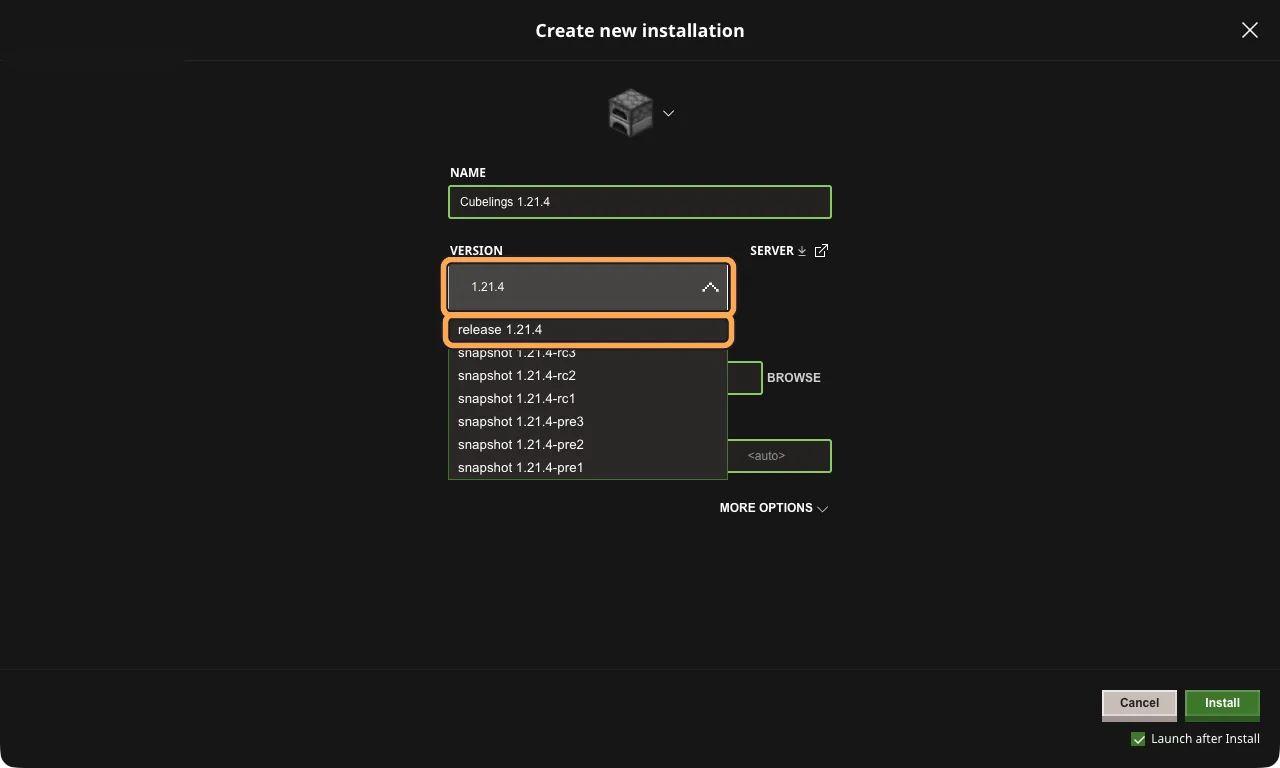
Select the Version box and type the version number your dashboard shows, for example 1.21.4. The list shrinks to match. Choose the line that starts with release, here release 1.21.4.
Do not choose a line that says snapshot, pre or rc. Those are test versions, and the world will not let them in.
-
Select Install
Leave the other settings as they are. Check that the Version box says release 1.21.4, then select Install.
When Launch after Install is ticked, the game starts on its own once the download finishes. That is fine: skip ahead to step 08.
-
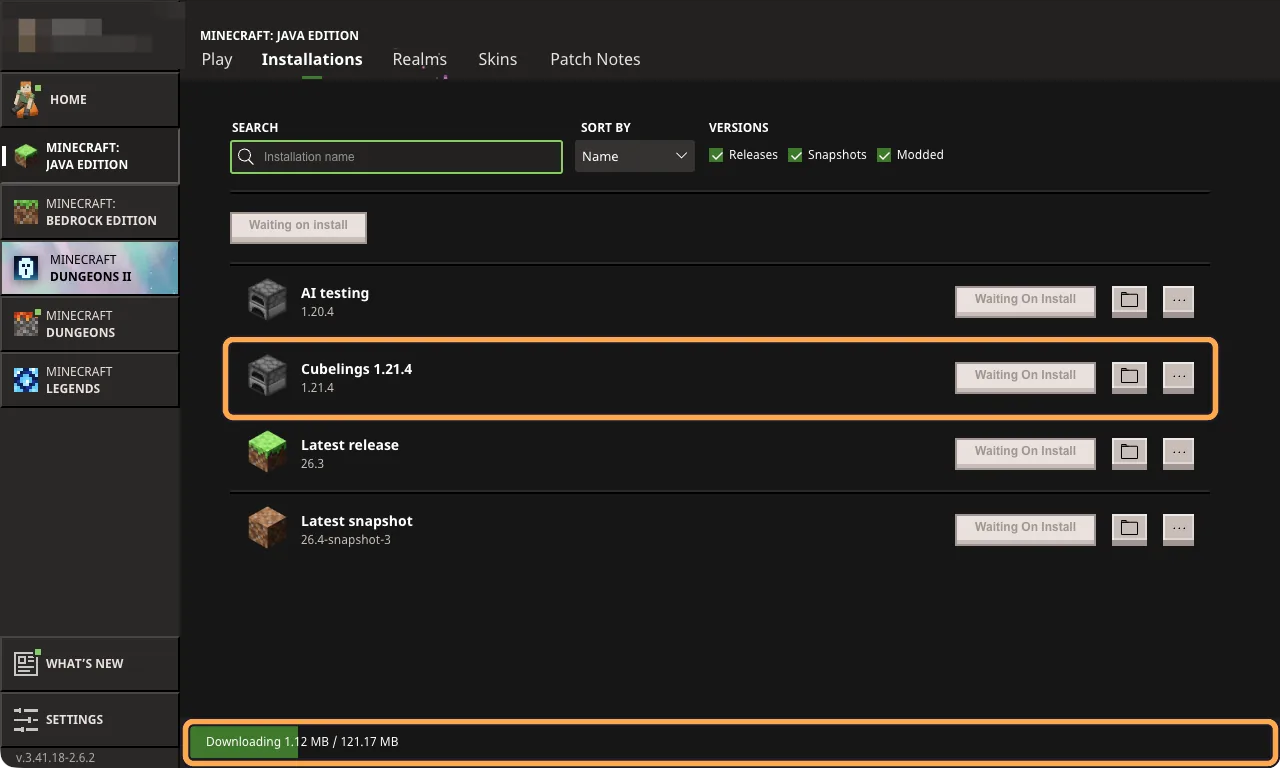
Wait for the download
The bar at the bottom shows the download. It was about 120 MB the first time we did it, and it only happens once. Your new installation is now in the list.
-
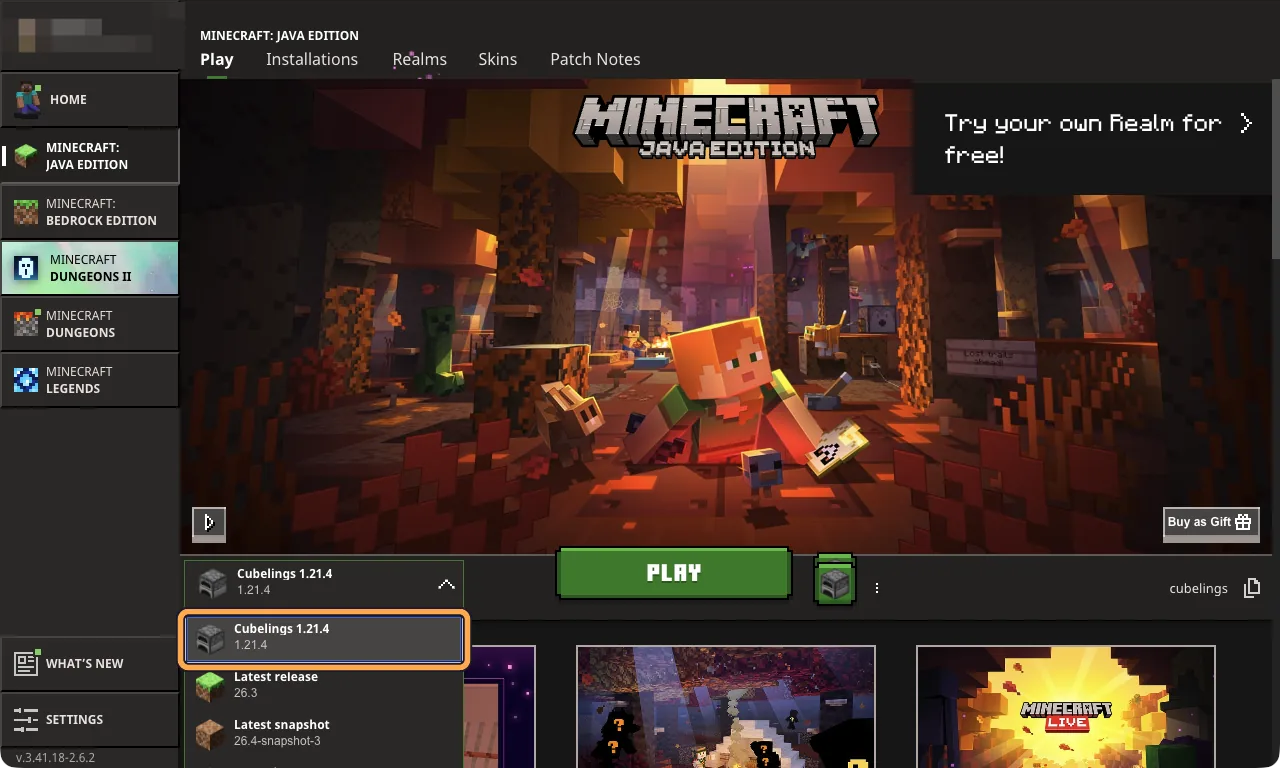
Next time, choose it on the Play tab
Go to the Play tab. Open the list to the left of the big PLAY button and select your new installation. The launcher remembers it, but check it each time, because an update can switch it back to Latest release.
-
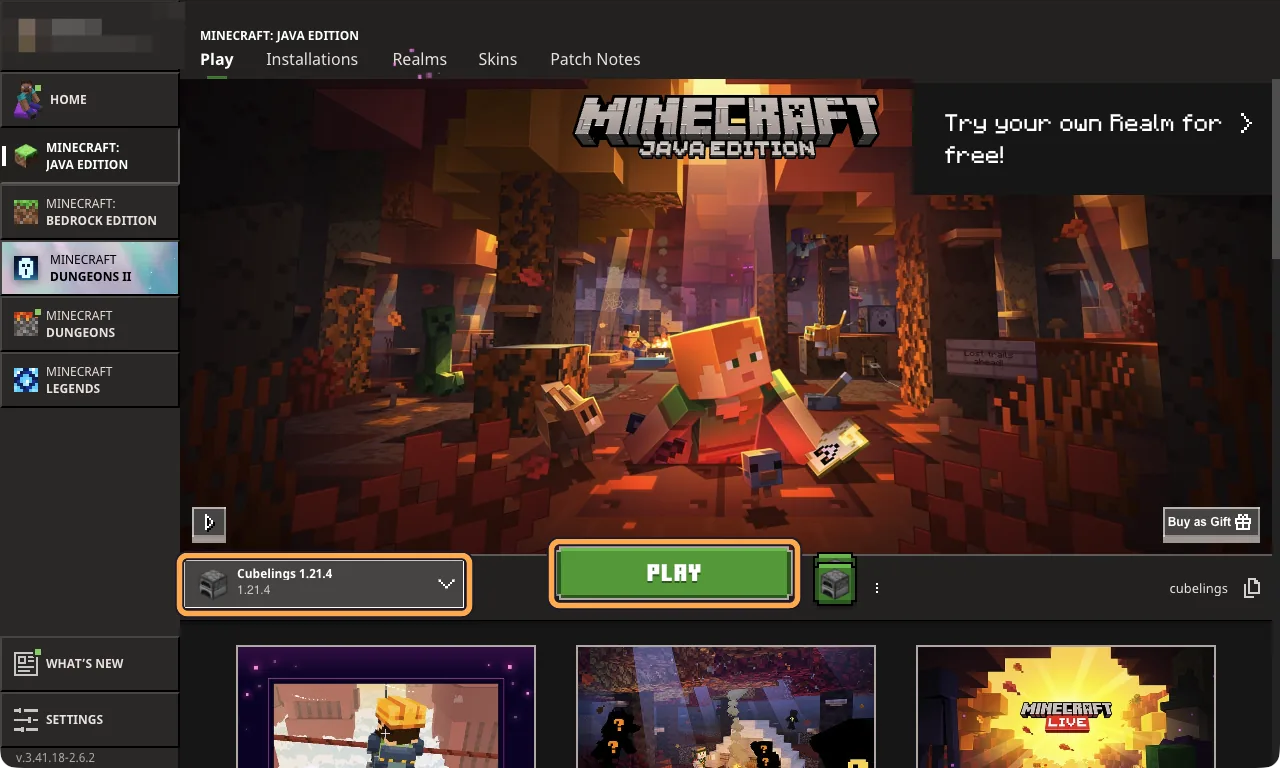
Press PLAY
With Cubelings 1.21.4 showing beside it, press PLAY. Minecraft opens in a new window.
Worth knowing
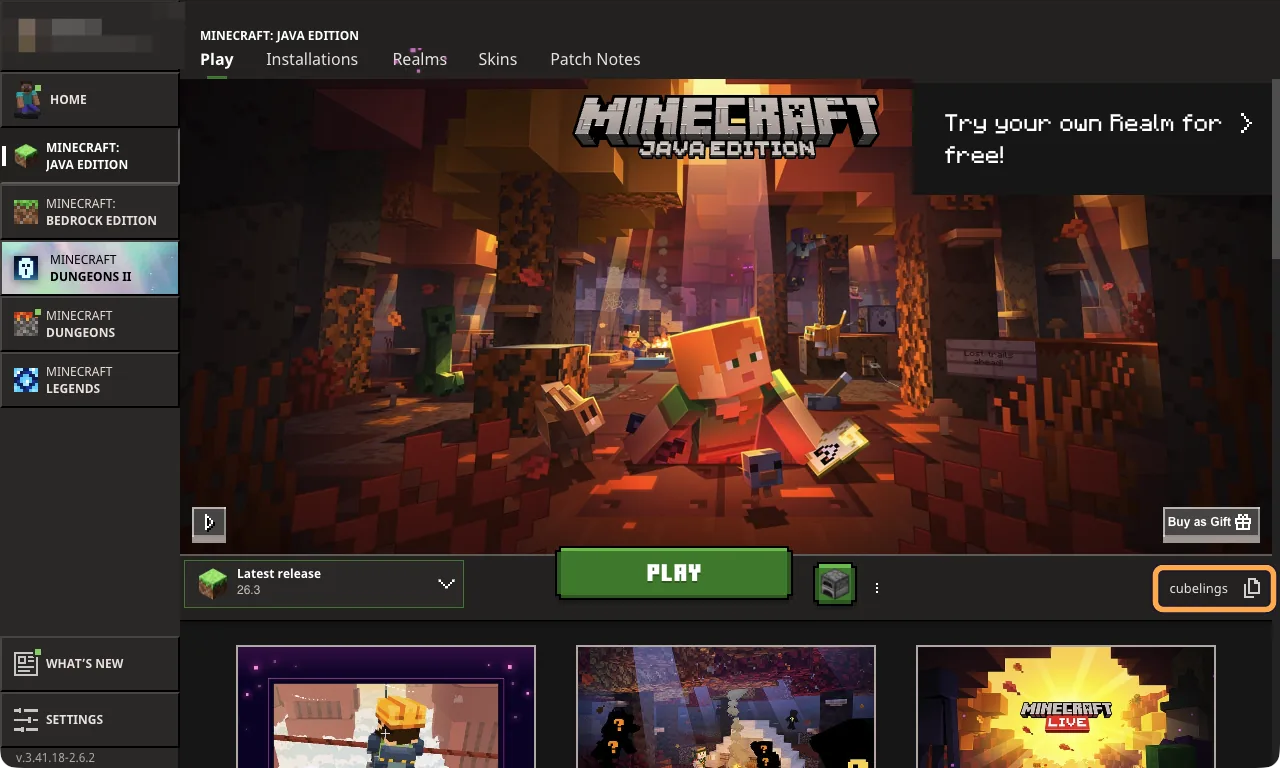
Where to find your Java profile name
The world owner adds players by their Java profile name. It is shown on the Play tab, to the right of the PLAY button. It can be different from the Microsoft account name at the top left of the launcher, so give the owner the name beside PLAY. In this picture it is cubelings.
Part 2 · Once in the game
Add your world and join
Start Minecraft from the installation you made in part 1. You add the world to your server list once; after that it is always there.
-
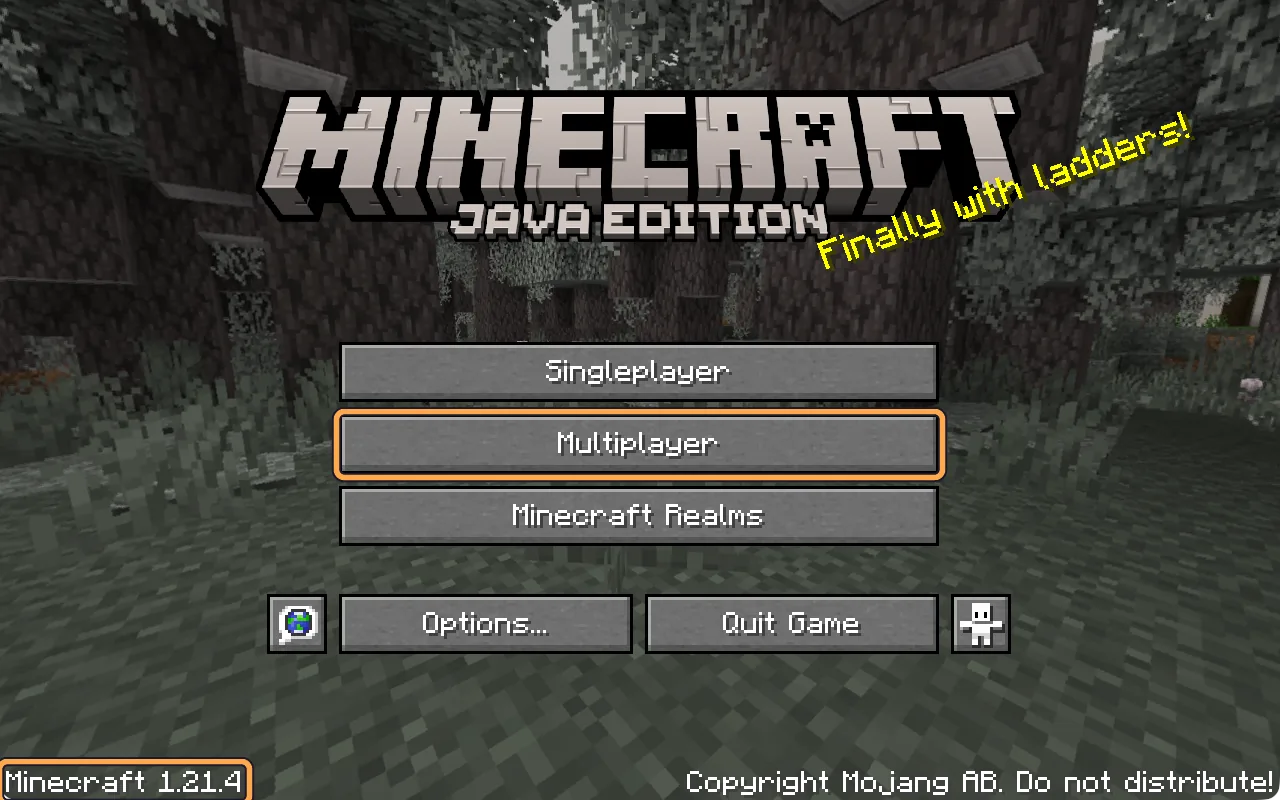
Check the version, then choose Multiplayer
The bottom-left corner of the title screen shows the version you are playing. It should match your world, for example Minecraft 1.21.4. Then select Multiplayer.
-
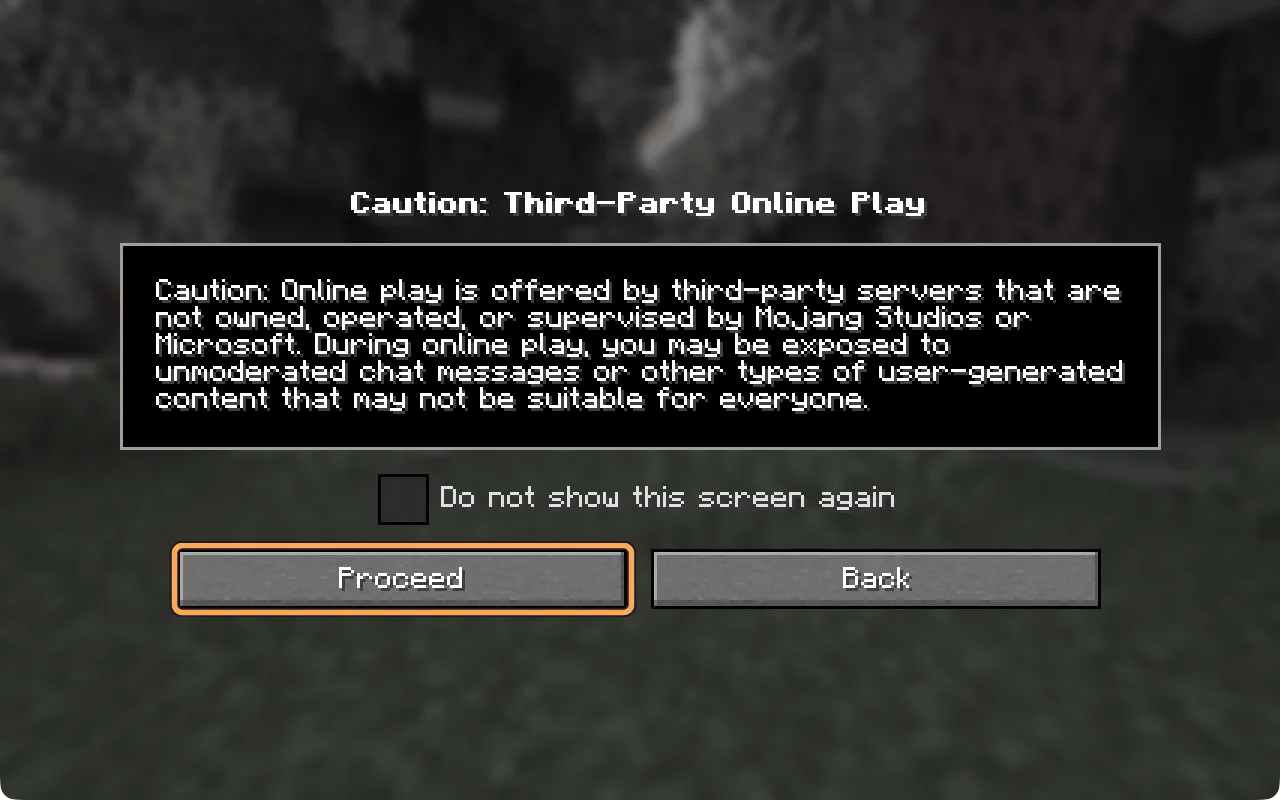
The first time only: select Proceed
Minecraft warns that online servers are run by other companies, not by Mojang or Microsoft. Cubelings is one of those, and your world only lets in the people on its player list. Select Proceed.
-
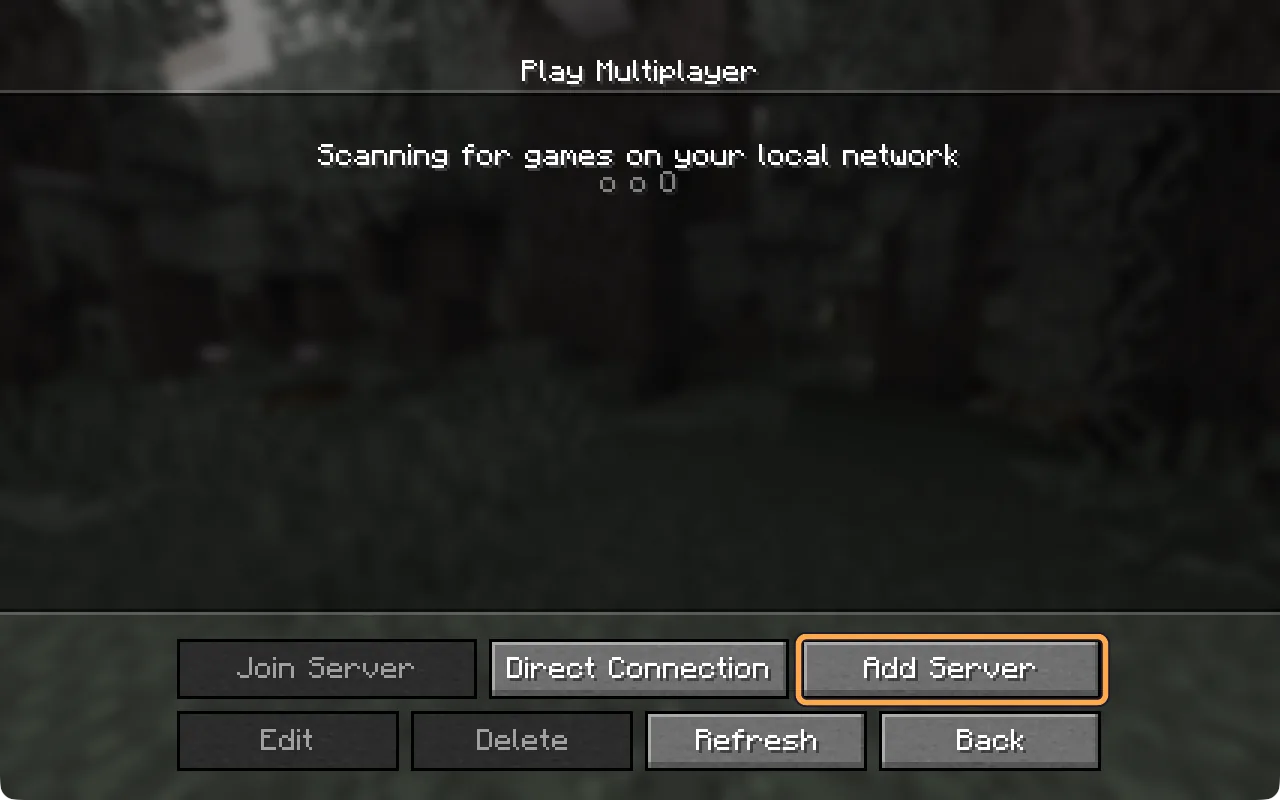
Select Add Server
The list is empty the first time. You add your world once and it stays in the list.
-
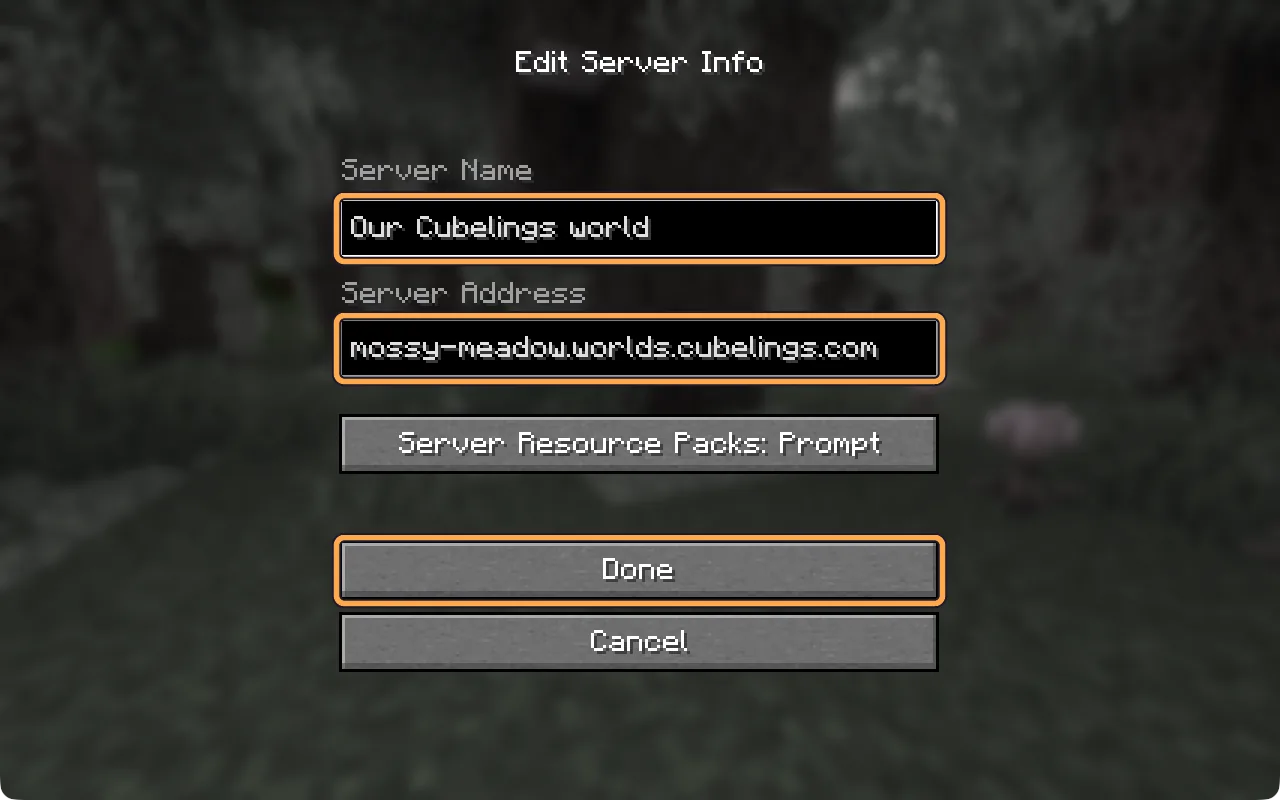
Type a name and paste the address
Server Name is only for you, so call it anything. In Server Address, paste the address from your Cubelings dashboard. It ends in .worlds.cubelings.com. Leave Server Resource Packs on Prompt, then select Done.
-
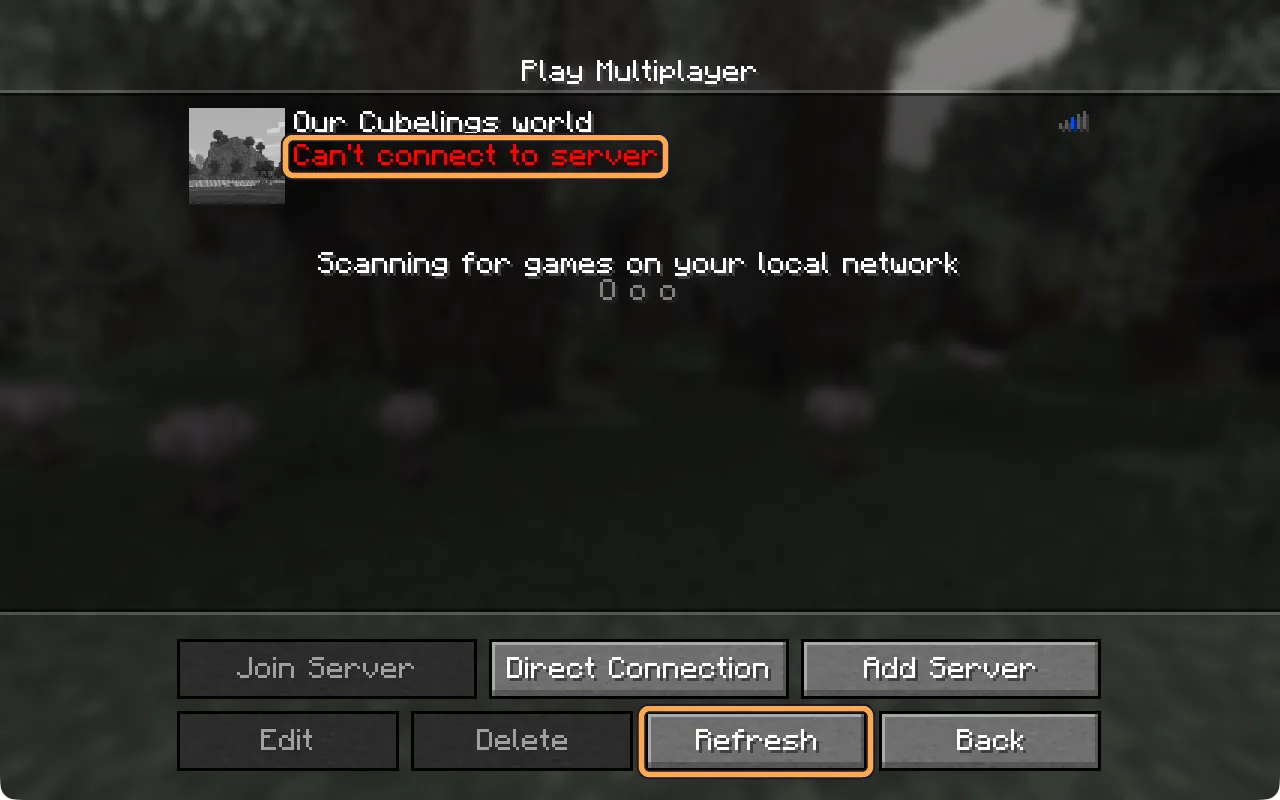
If it says “Can’t connect to server”, wait a minute
Your world sleeps when nobody is playing, and a sleeping world cannot answer. Adding it to the list starts waking it. Wait about a minute and select Refresh. When it is awake, the red text changes to the world’s message and a player count such as 0/5.
-
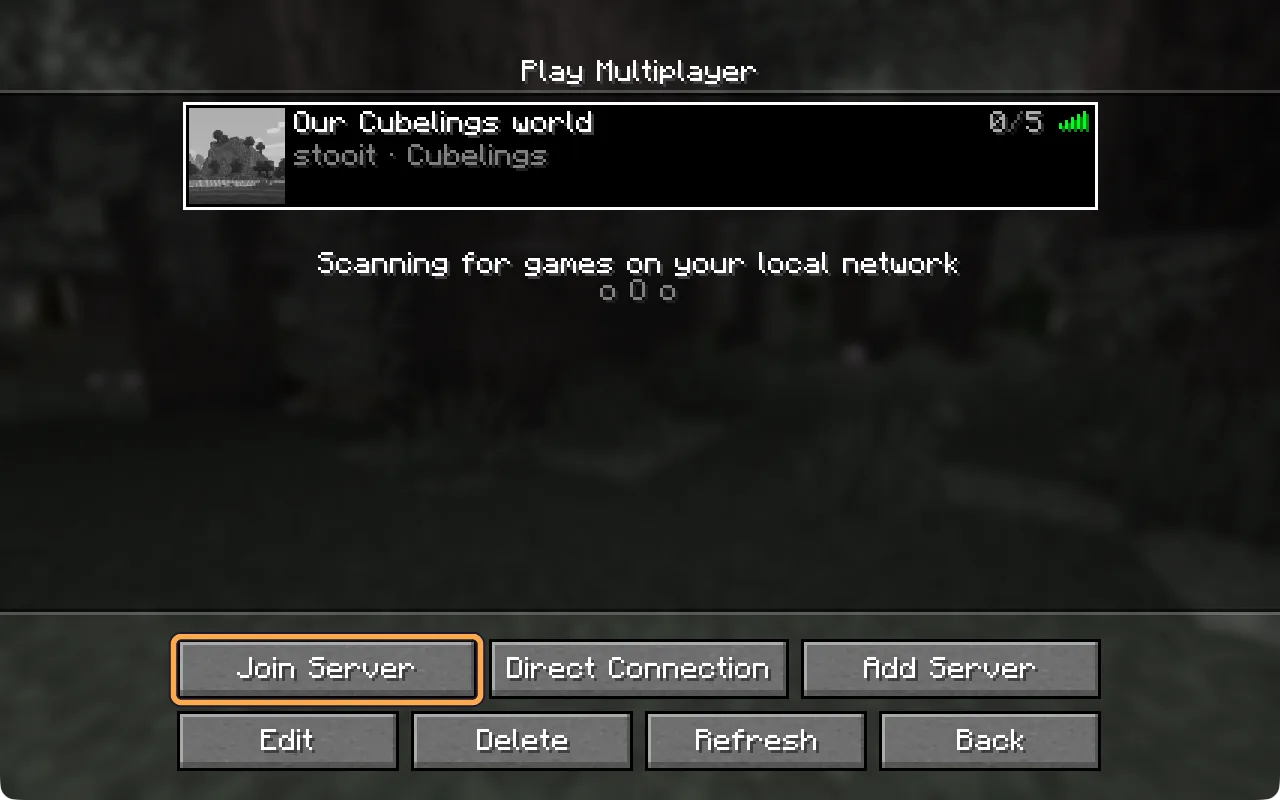
Select your world, then Join Server
Select the world in the list so it has a white border, then select Join Server. Double-clicking the world does the same.
-
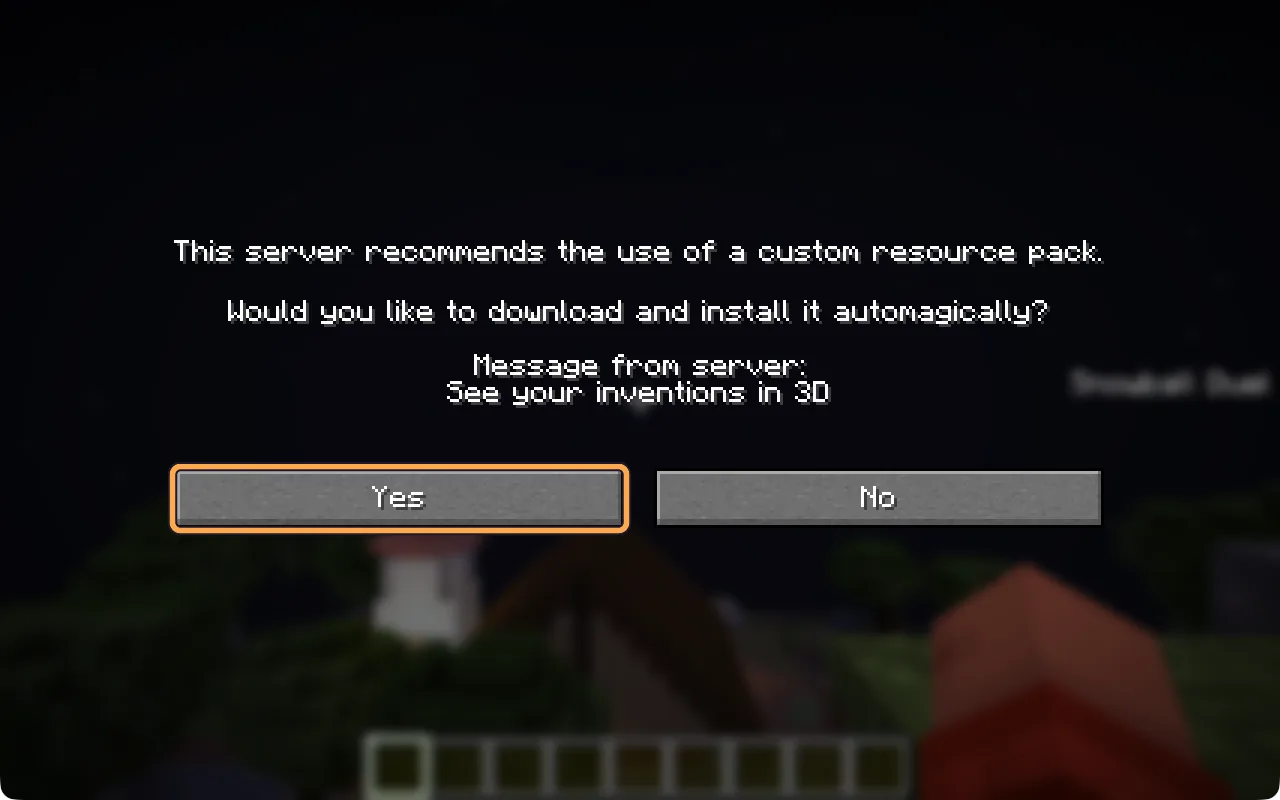
Select Yes for the resource pack
Your world offers a small resource pack that gives inventions their own look. Select Yes. If you select No you can still play, but inventions look like plain items.
A message saying Chat messages can’t be verified may appear in the top-right corner. That is normal on servers like this one and you can ignore it.
-
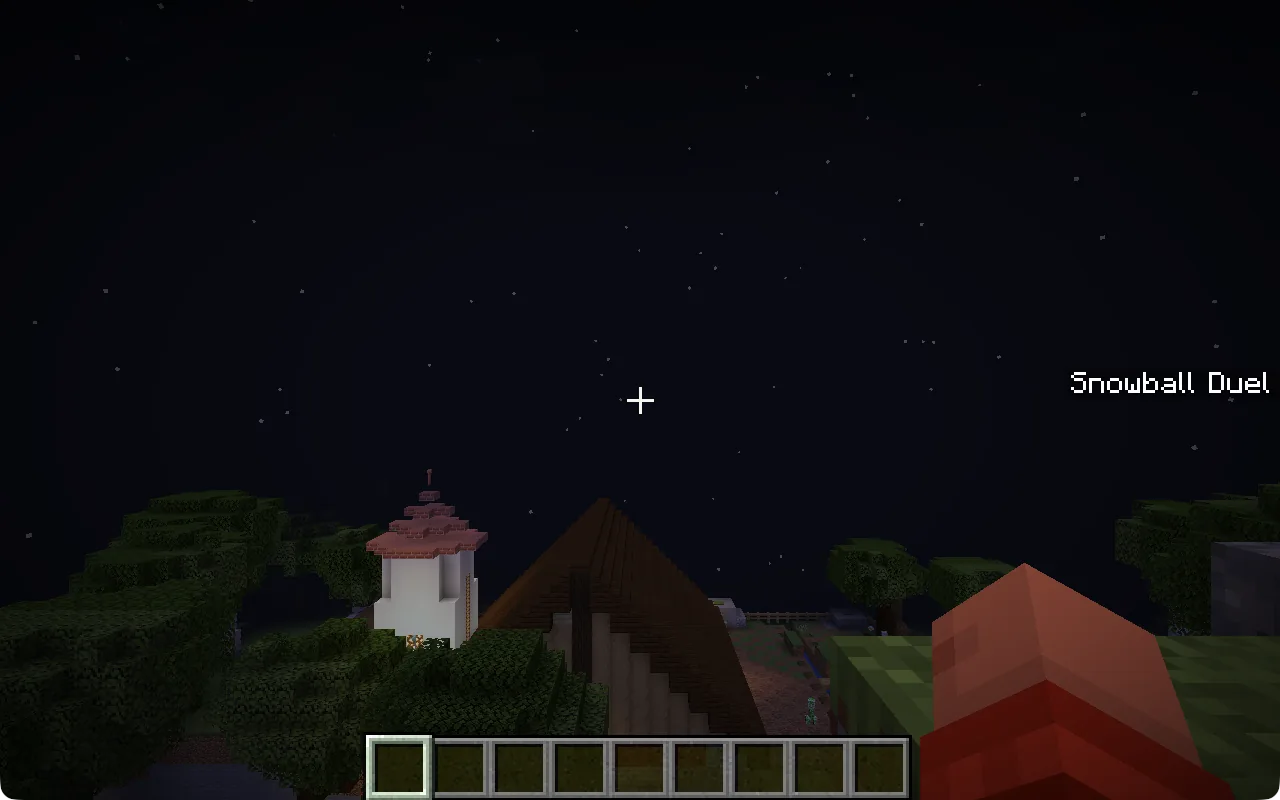
You are in
Press T to open chat and say hello to Cog, for example “hi Cog, what can you see?”. Press Esc and choose Disconnect when you are done. Next time, start from step 07 of the first part, then Multiplayer and Join Server.
If something goes wrong
Stuck?
- “You are not whitelisted on this server!” The owner has not added this Java profile name yet, or it is spelt differently. What to check.
- “Chat is not allowed by account settings”. The Microsoft account’s privacy settings block chat, which is common on children’s accounts. How to allow it.
- A message about an outdated or incompatible client. The game is on a different version from the world. Go back to part 1 and choose your installation on the Play tab.
- Everything else is on the troubleshooting list.